Ball Sleeve & Fittings Installation Guide
Step-by-step installation of a Fadeya ball sleeve fitting on a corrugated robot dresspack hose — parts overview, assembly sequence and a final inspection checklist.
A ball sleeve fitting is the interface between a robot dresspack's corrugated hose and the mounting point on the robot arm. Two sleeve halves close around the hose end to form a ball joint, so the hose can swivel as the arm moves instead of being forced to bend at a fixed angle. A cable divider holds each cable in its own opening where the hose exits.
This guide follows the assembly sequence shown in the Fadeya installation animation. It covers what each part does, the order the parts go together, and what to check before the dresspack goes into service. Dimensions, compatible hose sizes and tightening torque are specific to each fitting set — refer to the drawing supplied with your order or ask our engineers.
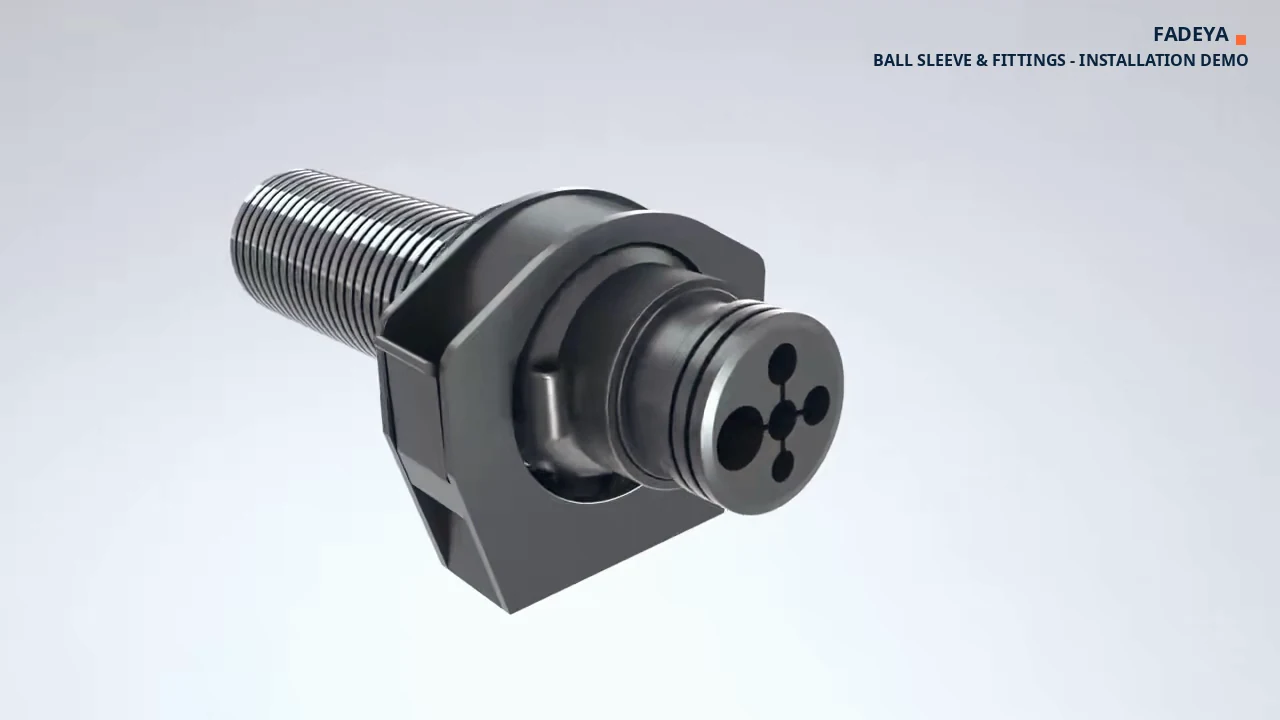 Assembled ball sleeve fitting with the corrugated hose, mount base and four-opening cable divider.
⚠️ Isolate the robot before you start. Move the arm to a safe service position, release stored energy and lock out power before working on the dresspack. Never fit or adjust a bracket while the robot is in automatic motion.
1. What you need
| Item | Note |
|---|---|
| Ball sleeve fitting set | Hose fitting, cable divider, two sleeve halves, mount base and fixing screws |
| Corrugated robot hose | Size matched to the fitting set |
| Screwdriver or hex key | For the fixing screws, size per the product drawing |
| Cable markers | To identify each cable before it is routed through the divider |
2. Parts overview
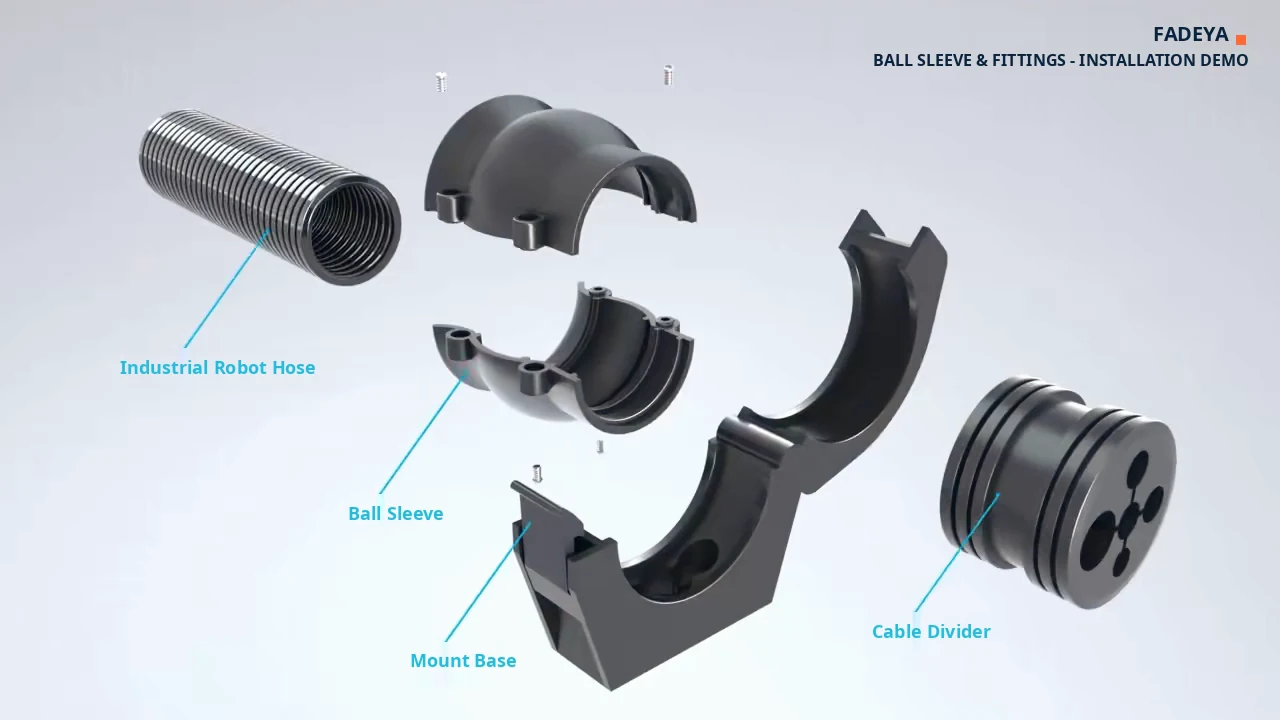 Exploded view of the ball sleeve fitting with the industrial robot hose, ball sleeve, mount base and cable divider labelled.
| # | Part | Function |
|---|---|---|
| 1 | Industrial robot hose | Corrugated protective hose carrying power, signal and air lines along the arm |
| 2 | Hose fitting | Threaded collar on the hose end that the sleeve grips |
| 3 | Cable divider | Insert with separate openings that keeps each cable in place at the hose exit |
| 4 | Ball sleeve (upper and lower halves) | Two curved shells that close around the fitting to form the swivelling ball joint |
| 5 | Mount base | Square flange bolted to the robot arm; houses the assembled ball joint |
| 6 | Fixing screws | Lock the sleeve halves and the mount base together |
The two halves must be assembled around the fitting — neither can be slid on afterwards over the divider. Check that the cable divider is in place before the housing closes.
3. Assembly
Step 1 — Seat the cable divider
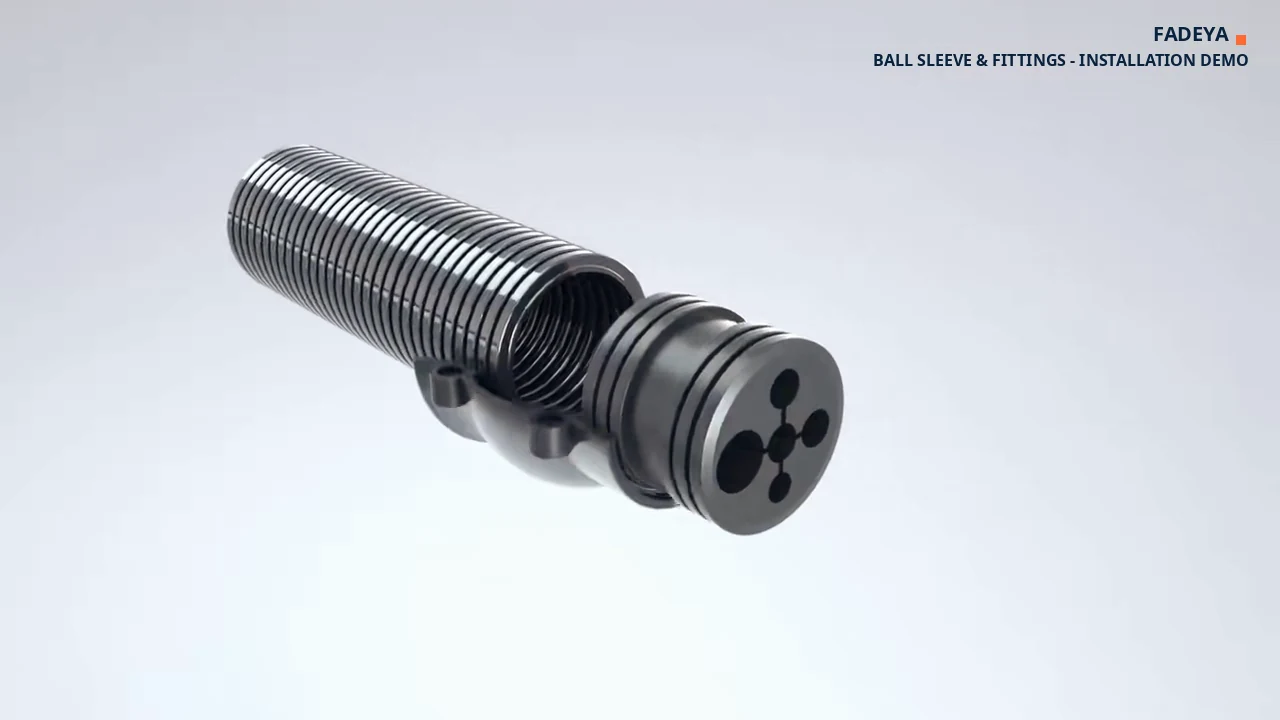 The cable divider fitted into the end of the corrugated hose.
Press the cable divider into the end of the hose until it sits square against the collar, and route each cable through its own opening. The divider is what stops cables twisting around each other at the exit point; once the sleeve halves are closed, it can no longer be adjusted.
Step 2 — Fit the upper sleeve half
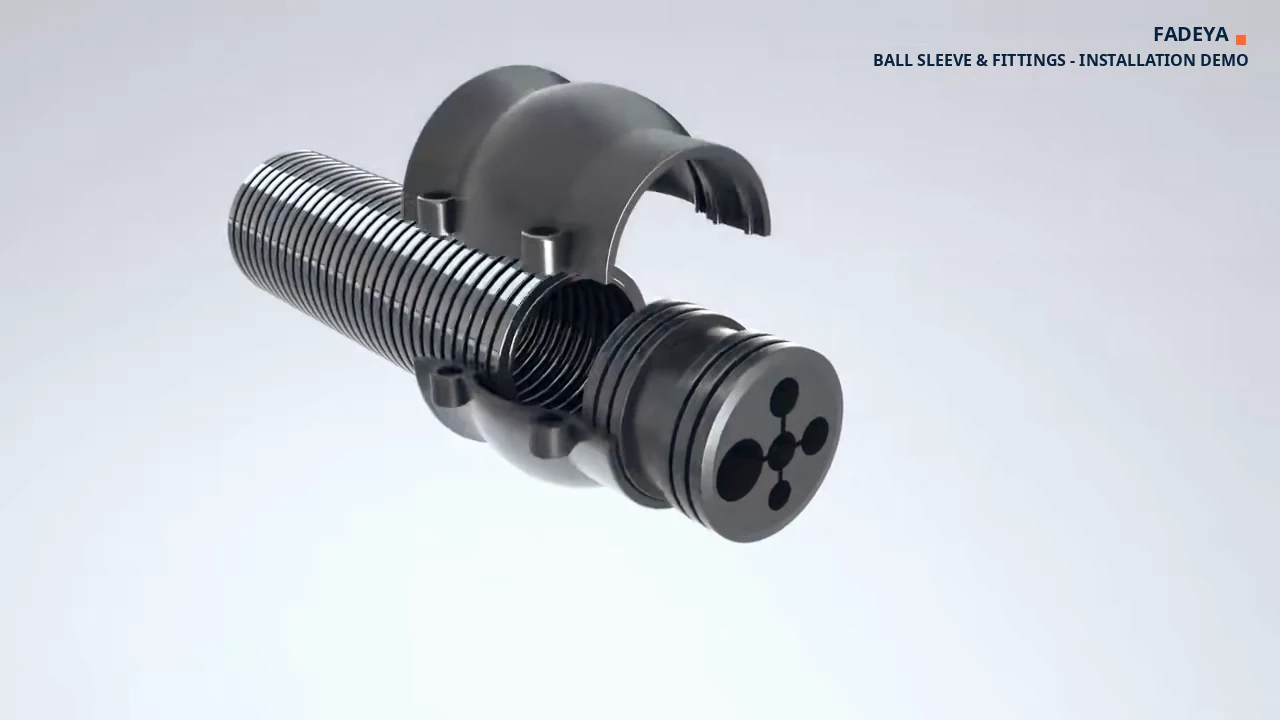 The upper ball sleeve half being lowered onto the hose fitting.
Lower the upper sleeve half over the hose fitting so its curved inner face sits on the ball of the fitting. It should rest on the fitting without force — if it has to be pushed, the divider is not fully seated or the wrong size is being used.
Step 3 — Bring in the lower half and the mount base
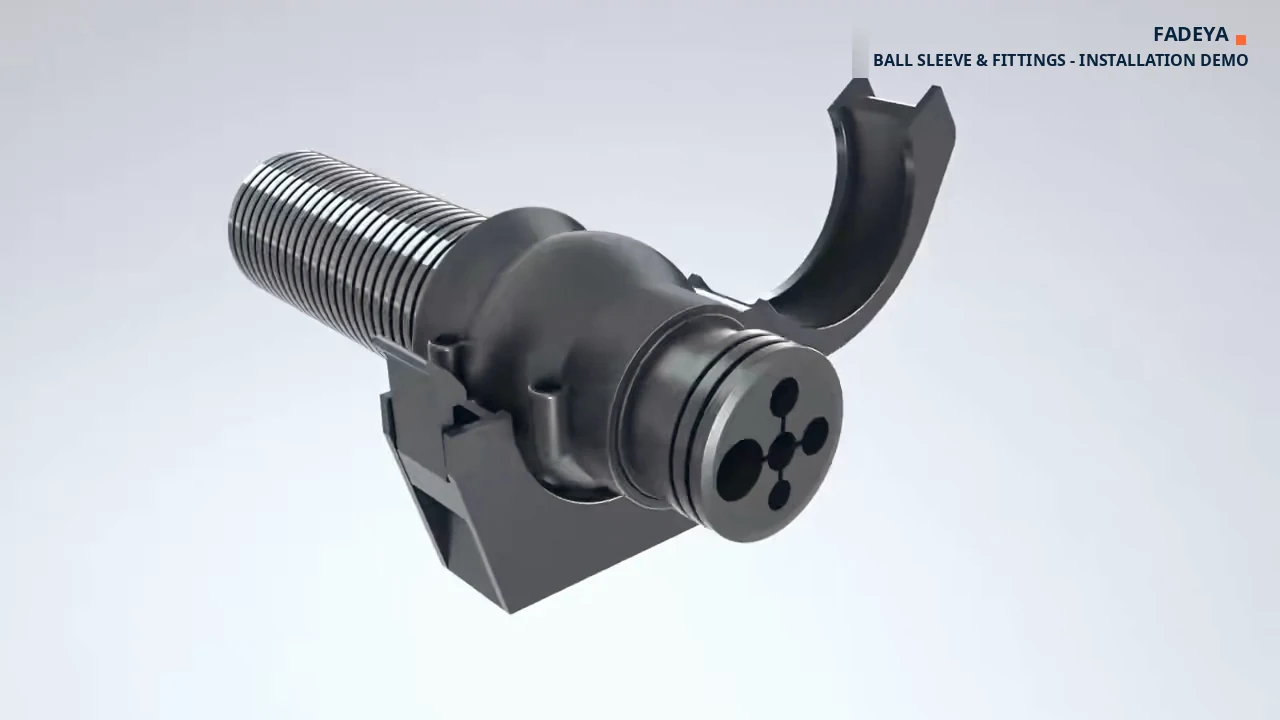 The lower sleeve half and the square mount base being fitted from below.
Fit the lower sleeve half together with the mount base from below. The mount base is the square flange that will be bolted to the robot arm; the two sleeve halves close around the fitting and trap the ball joint inside it.
Step 4 — Close the housing
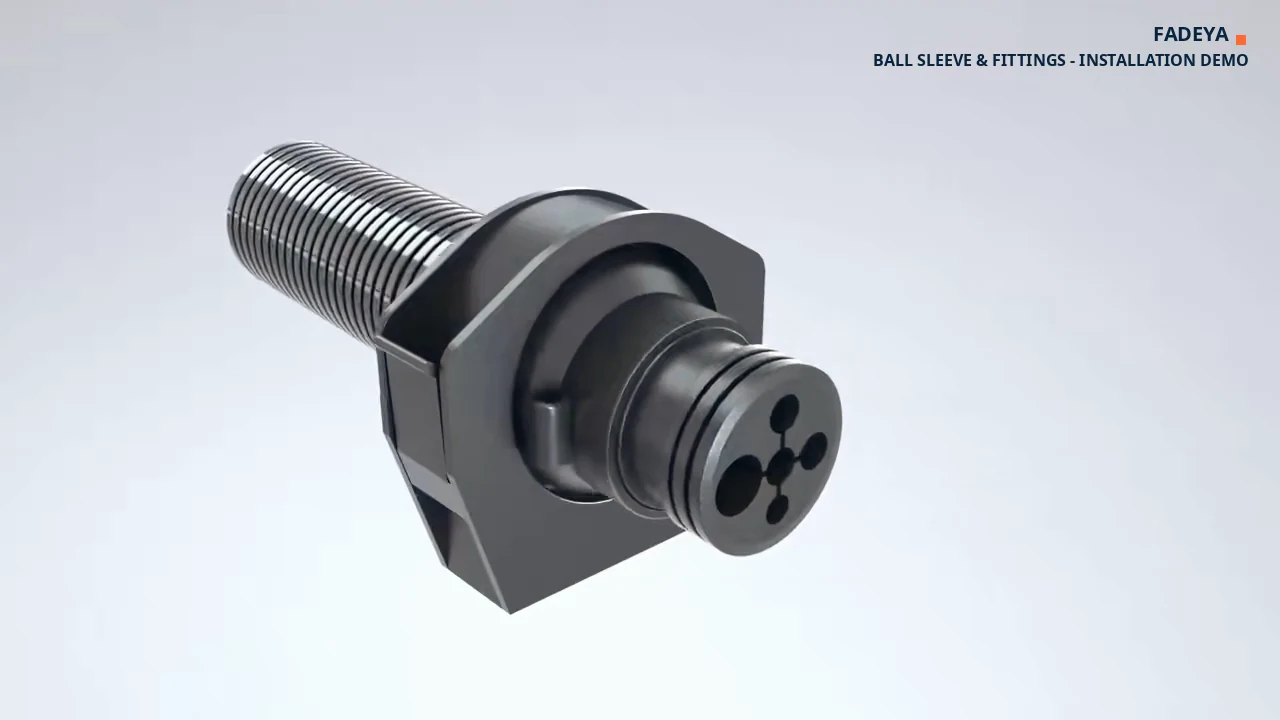 The ball sleeve fitting fully closed around the hose.
Bring the halves together until the joint line is flush all the way around, with no visible gap. Start every fixing screw before tightening any of them, then tighten evenly in a cross pattern. Tightening one side completely first leaves the housing skewed and stops the ball joint from swivelling freely.
Step 5 — Mount and set the range of motion
Bolt the mount base to the bracket position on the robot arm, then move the arm slowly by hand through its working envelope. The hose should follow the movement with the ball joint doing the turning — there should be no sharp bend at the hose exit and no torsional twist along the hose.
4. Verification checklist
Before returning the cell to service:
- Cable divider fully seated, with every cable in its own opening
- No cable pinched between the divider and the sleeve halves
- Sleeve halves closed flush, with no gap on the joint line
- All fixing screws started and evenly tightened
- Mount base securely bolted to the arm
- Ball joint swivels freely through the required range of motion
- Hose not pre-twisted along its length
- No interference with the arm, tooling or neighbouring cables through the full working envelope
5. Mistakes that cause early failures
| Mistake | Consequence |
|---|---|
| Divider not fully seated | Cables rub against the fitting edge and wear through |
| Housing closed before the cables are routed | Complete rework to reach the divider |
| One screw fully tightened before the others | Housing sits skewed, ball joint binds |
| Mount base fixed with the hose already twisted | Permanent torsional load and premature hose failure |
| Range of motion not checked on the actual arm | Hose snags or pulls out during production |
| Fitting set not matched to the hose size | Loose grip, or a sleeve that cannot be closed |
Need the right fitting for your hose?
Ball sleeve fittings are matched to the hose size and to the bracket position on the robot. Send us the robot model, the hose size and the cables to be routed, and we will confirm the matching set and the correct bracket position.
Request a quote → · Browse Robot Dresspack products → · Robot Dresspack Hose Sizes Explained →
Fadeya Co., Ltd. — Make Your Automation Project Easier